Support and Documentation
Publish and share your messages easily and beautifully
Detailed Overview of Easy Sermon Hub Plugin
Upload and activate the zipped file as normal. This will add a couple of new menu items to the WordPress dashboard.
Click on the new menu item called Hub Settings. Select the License tab, enter your license key, and click Activate License. It adds a new post type called Sermon that can be accessed from the WordPress drop-down menu bar under New, and from the Sermon Hub menu in the dashboard.
For more details on installing and activating the plugin, see this page
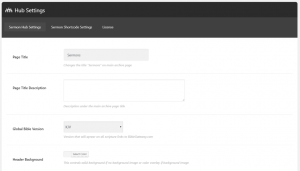
Sermon Hub Settings

The Hub Settings tab is where you set up how the plugin will work with your website. Here, you’ll set the page title, description, choose the Bible translation that the references open to (choose between KJV, NKJV, ESV, and NIV), choose the colors for the header text, links, backgrounds, the player controls, adjust the header height, set a background image, choose to show tags and filters, and set a default cover image (which appears for any sermons that you don’t upload an image for).
Sermon Shortcode Settings
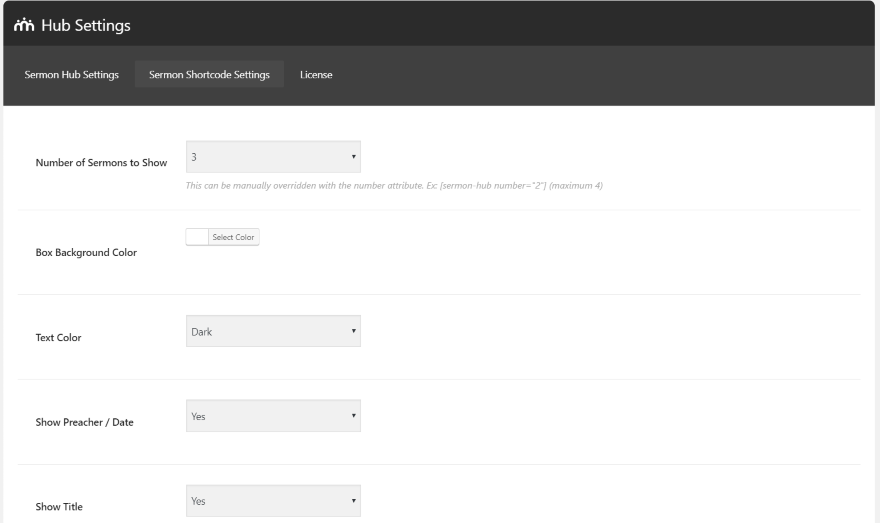
The Sermon Shortcode Settings tab lets you choose the default features for the shortcode. It includes the number of sermons to show (which can be over-ridden manually within the shortcode), the background and text colors, to show the preacher and date, and to show the title.
Sermon Hub Menu

The Sermon Hub dashboard menu provides the sermon editing options. Create a new sermon, see the sermon list, and edit preachers, series, topics, books, and services. In this example we have Yoast SEO installed and it’s providing filtering by SEO scores and by Readability Scores.
Add New Sermon
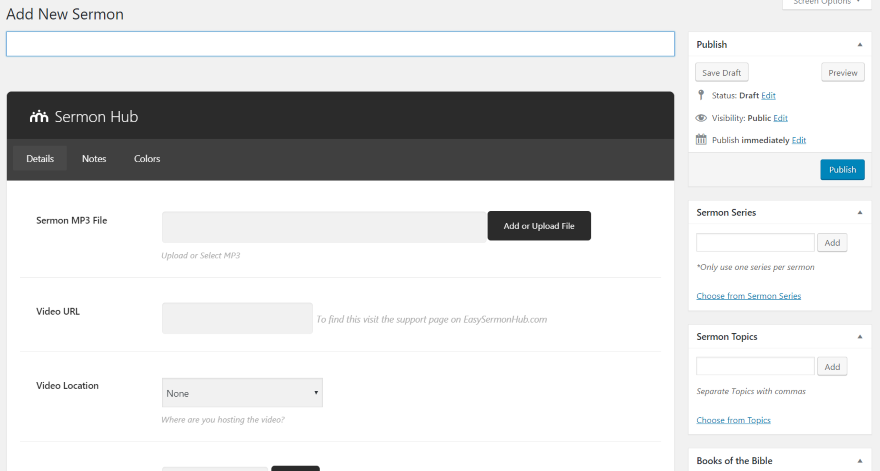
Adding a new sermon opens an editor with features similar to creating a post. Along the right side, you can publish, add a sermon series, add sermon topics, and add the book of the Bible. These work the same as categories and tags. The sermon editor includes three tabs: Details, Notes, and Colors.
The Details tab has areas to upload an audio file (this is a media uploader), add a video URL, choose the video location (YouTube or Vimeo), enter a reference verse, preacher, sermon date (opens a calendar), service, and a cover image. You’ll need to create the preachers and services categories separately first (you can’t create them from this editor).
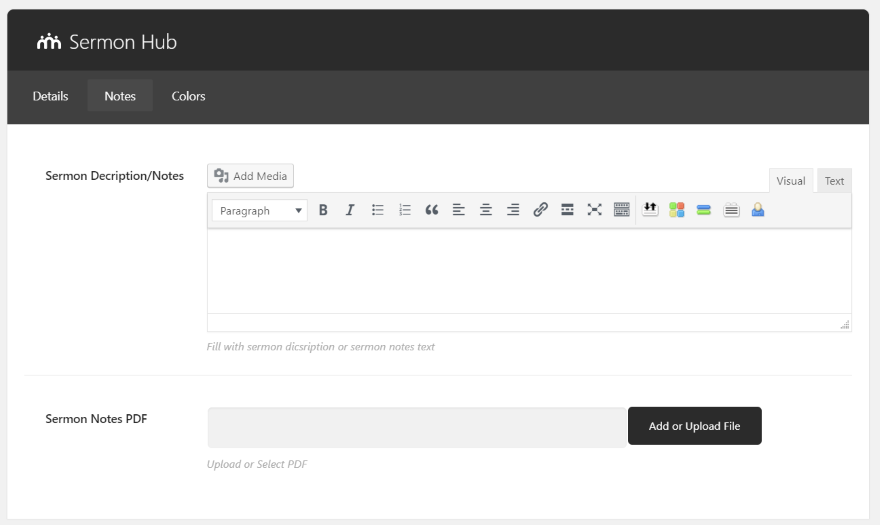
The Notes tab includes a visual editor to add a description. Just like the WordPress editor you can add text and media. It also has a field where you can upload a PDF file for the sermon notes. This will be available as a download to your visitors.
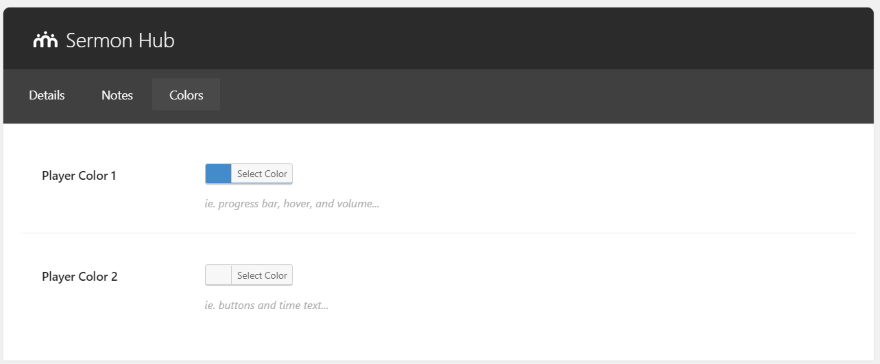
The Colors tab lets you choose the player colors for this specific post.
Add Preachers
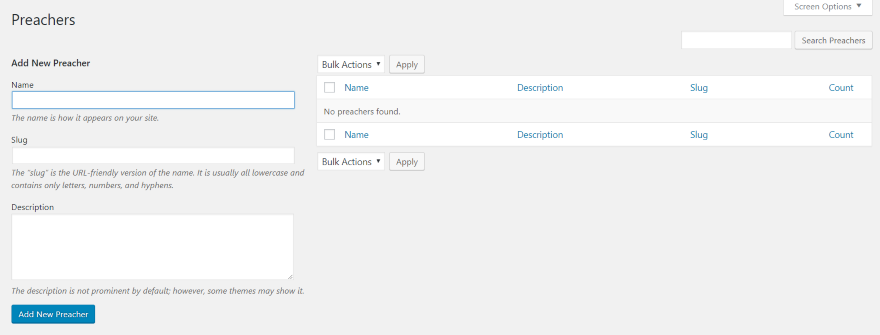
Adding Preachers works the same way as adding categories, except that you can’t add them from the sermon editor. You’ll need to add them first and then you can select them when you create the sermon.
Service Types
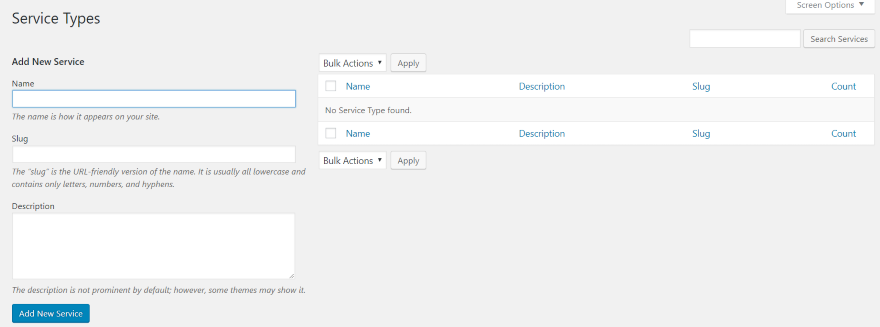
Services will also have to be added in their own editor before they can be selected in the sermon creation editor. This is useful to separate morning and nightly services and special occasions.
Sermons Page
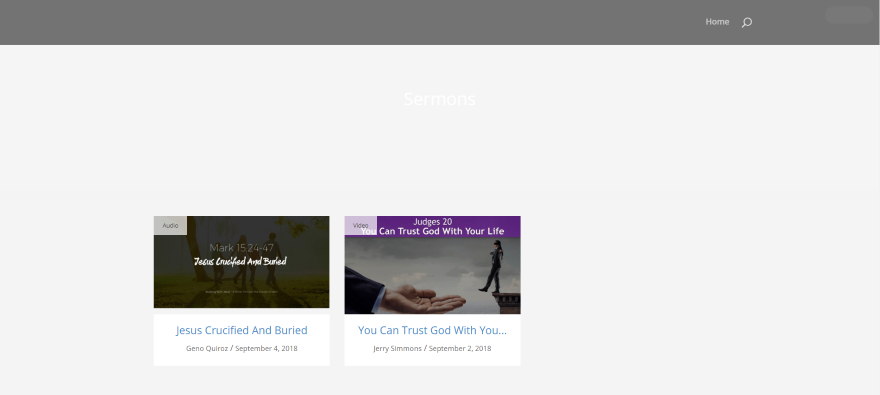
A new archive page is created called Sermons. This is the default settings. I’ll need to make some adjustments.
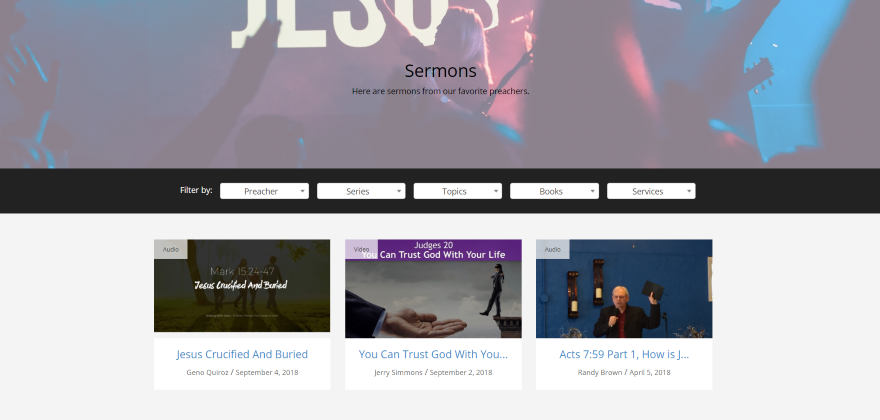
I’ve added some customizations to the sermons page. I changed the title to dark text, added a description to the page (which appears under the title), added a header image (from Unsplash) and transparent overlay, and added the filters. You can filter the sermons by preacher, series, topics, books of the Bible, and services.
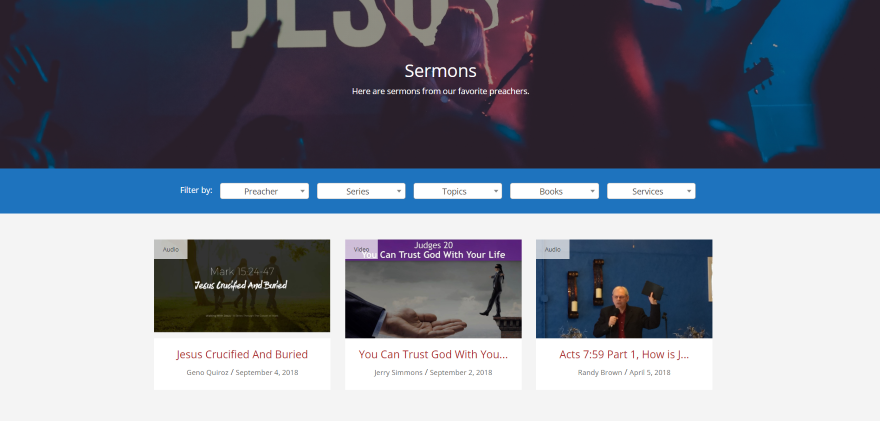
The background and text colors are customizable. I’ve changed the header overlay to dark and the header text to light. I’ve also customized the colors for the filter background and text, and the global link color.
All these sermon page settings are changed using the Hub Settings screen.